Update EPiServer Commerce SKU price in lightweight way - Service Api
Lately I’ve been playing around EPiServer Service API. I found these interfaces really simple and lightweight way to manipulate with your catalog’s content and characteristics of the items in the catalog. This blog post will show you the way how you can update SKU prices via these services using REST client library called “Refit”. There are tons of various style and type REST client frameworks for accessing and consuming REST services. I do not have any interest in promoting “Refit” here, but found it really convenient way to work with.
Getting Started
You will need to install EPiServer.ServiceApi.Commerce package from EPiServer’s NuGet feed to add REST service endpoints to your web site’s project.
1
PM > Install-Package EPiServer.ServiceApi.Commerce
This package will also pull down EPiServer.ServiceApi package that contains some core endpoints for checking version of the Api library or, for instance, issuing access tokens.
Important to note, that in current implementation Service APIs allows only TLS/SSL access to the endpoints. It means if you are developing locally on IIS Express, you may need to enable SSL settings for the project:
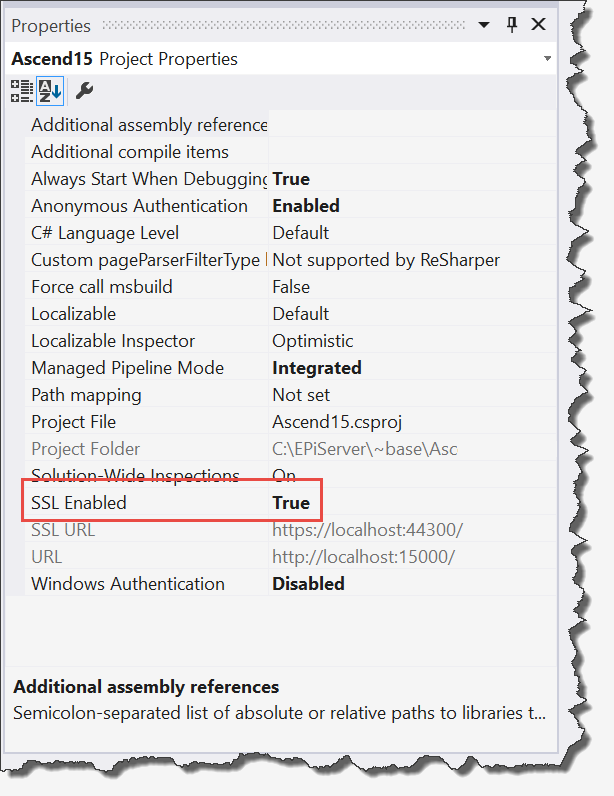
If you are running in IIS, then you can issue self-signed certificate to enable SSL connection to the server.
If you still experience TLS/SSL connection handshake failure (client app can’t make connection to target server because of self-signed certificate is not trusted, even if you added it to trusted CA root) you can for development purposes add exception to ServicePointManager to trust all certificates:
1
2
ServicePointManager.ServerCertificateValidationCallback +=
    (sender, cert, chain, sslPolicyErrors) => true;
NB! Don’t forget to remove this line for production use!
Verify Service Endpoints
After you have installed package and re-compiled, re-launched the solution and login in CMS, you should be able to navigate to https://localhost:44300/episerverapi/version and see similar response:

Which means that Service Api were registered correctly and at least /version route is working and you can access Api’s version information.
Define Service Contract Interface
“Refit” library is using interface for generating client interceptor type that you can use to call REST endpoint. For simplicity let’s start with very basic set of methods needed for now to verify working state of the Service API endpoints.
1
2
3
4
5
6
7
8
9
10
11
12
13
14
15
16
17
18
19
20
21
22
23
24
25
26
27
28
29
30
31
32
33
34
35
36
public class AccessTokenRequest
{
    public AccessTokenRequest(string username, string password)
    {
        Username = username;
        Password = password;
    }

    public string Username { get; set; }
    public string Password { get; set; }

    [AliasAs("grant_type")]
    public string GrantType => "password";
}

public class AccessTokenResponse
{
    [JsonProperty("access_token")]
    public string Token { get; set; }

    [JsonProperty("token_type")]
    public string Type { get; set; }

    [JsonProperty("expires_in")]
    public int Expires { get; set; }
}

public interface ICommerceServiceApi
{
    [Get("/episerverapi/version")]
    Task<string> GetVersionAsync();

    [Post("/episerverapi/token")]
    Task<AccessTokenResponse> GetTokenAsync(
        [Body(BodySerializationMethod.UrlEncoded)] AccessTokenRequest request);
}
AliasAs attribute is needed because we are changing name of the property and how it should be rendered in outgoing POST. How exactly this interface will be used - we will get back to that!
Create Consumer App
There are no special requirements for the client application. You need to install “Refit” library to work with REST services.
1
PM > Install-Package Refit
Authenticate Against Services
You will need an Access Token in order to submit any data to service or in some cases - even talk to the service (Http method - GET). User access tokens are issued via /episerverapi/token endpoint. Currently EPiServer Service Api supports OAuth authentication method called Bearer.
If we take a look at Service API documentation, we can see that it’s required to provide username and password to authenticate against it. Using extensible and rich WebApi client model, we can create a client message handler that will intercept calls and inject Http Header with this Bearer authentication data if requested by service endpoints, but don’t worry - we will get there!
1
2
3
4
5
6
7
8
9
10
11
12
13
14
15
16
17
18
19
20
21
22
23
24
25
internal class AuthenticatedHttpClientHandler : HttpClientHandler
{
    private readonly Func<Task<string>> getToken;

    public AuthenticatedHttpClientHandler(Func<Task<string>> getToken)
    {
        this.getToken = getToken;
    }

    protected override async Task<HttpResponseMessage> SendAsync(
                                               HttpRequestMessage request,
                                               CancellationToken cancellationToken)
    {
        var auth = request.Headers.Authorization;
        if (auth != null)
        {
            // See if the request has an authorize header
            var token = await getToken().ConfigureAwait(false);
            request.Headers.Authorization = new AuthenticationHeaderValue(auth.Scheme,
                                                                          token);
        }

        return await base.SendAsync(request, cancellationToken).ConfigureAwait(false);
    }
}
Now when client message handler is in place, we can create new instances of REST service client proxy class:
1
2
3
4
5
var serviceFacade = RestService.For<ICommerceServiceApi>(
    new HttpClient(new AuthenticatedHttpClientHandler(GetTokenAsync))
{
    BaseAddress = new Uri("https://localhost:44300")
});
“Refit” library allows you explicitly create new client proxy class instance by specifying HttpClient class to use, which in turn allows you to specify client message handler - that is out newly created “interceptor”.
Method GetToken is responsible for generating and retrieving access token from the server:
1
2
3
4
5
6
private async Task<string> GetTokenAsync()
{
    var client = RestService.For<ICommerceServiceApi>("https://localhost:44300");
    var token = await client.GetTokenAsync(new AccessTokenRequest("admin", "store"));
    return token.Token;
}
So it really depends on how you secure your user’s credentials - “admin” user is somebody that EPiServer Commerce added by default to the user storage, but it depends on your solution architecture and security requirements - how you store, retrieve and use usernames and corresponding passwords.
After we have supplied client message handler for intercepting requests and adding authentication header to the request, and also providing the way how tokens get generated - we can switch to actual endpoint usage and try to call EPiServer Commerce endpoint for retrieving SKU item prices.
Get SKU Price Data
To retrieve prices, we need to update Service API service contract interface:
1
2
3
4
5
6
7
8
public interface ICommerceServiceApi
{
    ...

    [Get("/episerverapi/commerce/entries/{entryCode}/prices")]
    [Headers("Authorization: Bearer")]
    Task<IEnumerable<PriceValueModel>> GetPricesAsync(string entryCode);
}
From service contract interface you can see that there is an attribute [Headers("Authorization: Bearer")] added to the GetProductPricesAsync method. This will kick in client message handler and new token for this request will be generated and associated with new request (method GetToken() will be called from client message handler).
PriceValueModel is just yet another service contract model class, that describes what’s exactly is on the response for GetPricesAsync method.
1
2
3
4
5
6
7
8
9
10
11
12
13
14
15
[Serializable]
public class PriceValueModel
{
    public long? PriceValueId { get; set; }
    public string CatalogEntryCode { get; set; }
    public Guid ApplicationId { get; set; }
    public string MarketId { get; set; }
    public string PriceTypeId { get; set; }
    public string PriceCode { get; set; }
    public DateTime ValidFrom { get; set; }
    public DateTime? ValidUntil { get; set; }
    public decimal MinQuantity { get; set; }
    public decimal UnitPrice { get; set; }
    public string CurrencyCode { get; set; }
}
So, once we have established connection with REST service endpoint, now we can retrieve prices for our catalog entries. Let’s assume that there are some catalog entries with known codes (Awesome-Glasses--Black-L and Awesome-Glasses--Blue-L).
Usually prices may come from some external ERP systems, most probably generated as physical file on some file share with some weird XML format. Anyway, if we abstract from concrete implementation on how prices may be retrieved, this is the code fragment how you can reach service and ask for prices for these 2 SKUs:
1
2
3
4
5
6
7
8
9
10
11
12
13
14
15
16
17
18
19
20
21
22
23
24
25
26
27
28
29
var serviceFacade = RestService.For<ICommerceServiceApi>(
                        new HttpClient(new AuthenticatedHttpClientHandler(GetTokenAsync))
                        {
                            BaseAddress = new Uri("https://localhost:44300")
                        });

var newPrices = new Dictionary<string, decimal>
{
    {
        "Awesome-Glasses--Black-L", 555.55M
    },
    {
        "Awesome-Glasses--Blue-L", 222.22M
    }
};

foreach (var newPrice in newPrices)
{
    var existingPriceResult = await serviceFacade.GetPricesAsync(newPrice.Key);
    if (existingPriceResult.Any())
    {
        // price value exists for this SKU
    }
    else
    {
        // price does not exist for this SKU
    }

}
Note how elegant is authentication done when accessing REST service?! No, you may not even notice - because it’s unobtrusive and transparent for consumer.
Update Prices
When we can test either SKU has price or hasn’t - we can decide either we need to POST (create new price for the SKU) or PUT - update existing price.
1
2
3
4
5
6
7
8
9
10
11
12
13
14
15
16
17
18
19
20
21
22
23
24
25
foreach (var newPrice in newPrices)
{
    var existingPriceResult = await serviceFacade.GetPricesAsync(newPrice.Key);

    if (existingPriceResult.Any())
    {
        var existingPrice = existingPriceResult.First();
        existingPrice.UnitPrice = newPrice.Value;
        await serviceFacade.UpdatePriceAsync(newPrice.Key,
                                             existingPrice.PriceValueId.Value,
                                             existingPrice);
    }
    else
    {
        await serviceFacade.SetPriceAsync(newPrice.Key,
                                          new PriceValueModel
                                          {
                                              CatalogEntryCode = newPrice.Key,
                                              MarketId = "DEFAULT",
                                              CurrencyCode = "USD",
                                              UnitPrice = newPrice.Value,
                                              ValidFrom = DateTime.UtcNow,
                                          });
    }
}
Code fragment may contain some hard-coded values and placeholders. It’s left unimplemented intentionally :)
Summary
Service Api is really easy and lightweight way to talk to your Commerce backend and do some stuff there via some scripting language, C# job that is responsible for importing some stuff or updating data in catalog on regular basis. However Service Api is not designed to be used externally and be exposed to public usage and, for instance, consumed from even your own site’s front-end part.
Also only Bearer authentication support we find as limitation for current Service Api service implementation.
Set of Service Api endpoints are really useful when dealing with backend integration cases and scenarios, when you as Commerce site supplier or owner can provide quick and wasy way for 3rd party system to integrate and “push” data into Commerce.
Happy updating!
[eof]
Comments powered by Disqus.